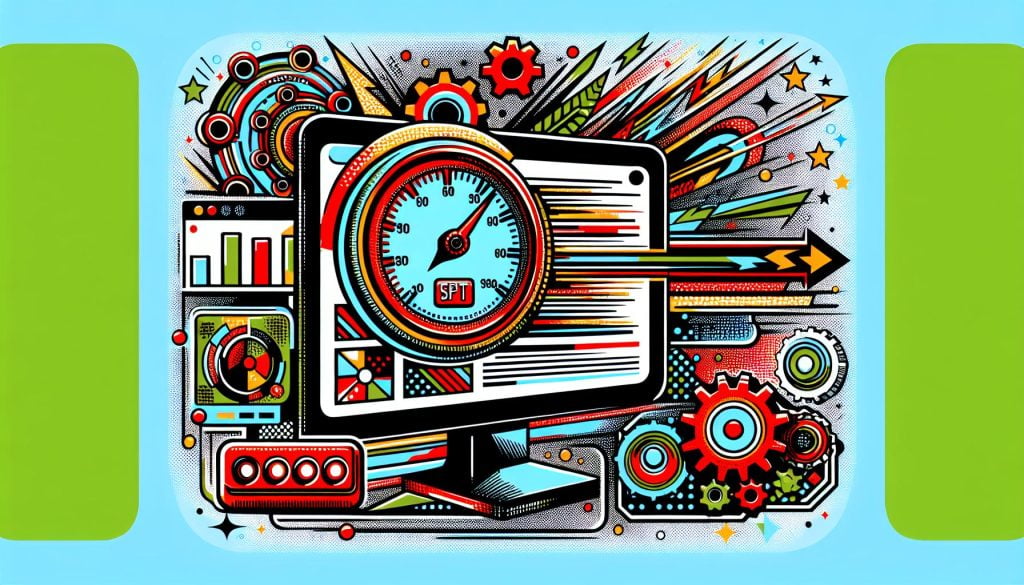
If you’re running a Magento 2 site, you know how crucial page load times are for keeping your visitors happy and engaged. That’s where LiteMage Cache comes in—a powerful solution designed to turbocharge your site’s performance. In this guide, we’ll walk you through the ultimate setup to get the most out of LiteMage Cache for your Magento 2 store.
Setting up LiteMage Cache might seem daunting at first, but don’t worry. We’re here to break it down for you, step by step. By optimizing your site’s caching, you’ll not only improve user experience but also give your site a boost in search engine rankings. Let’s dive in and unlock the full potential of your Magento 2 store with LiteMage Cache.
Why choose LiteMage Cache for Magento 2
When you’re looking to enhance your Magento 2 store, speed and efficiency are top priorities. LiteMage Cache emerges as the beacon of hope in the demanding world of e-commerce platforms. But why opt for LiteMage over countless other caching solutions? The answer lies in its unique ability to drastically improve your site’s performance while ensuring an unbeatable user experience.
At its core, LiteMage leverages the powerful LiteSpeed Server technology, specifically engineered to handle the complex and dynamic content that Magento stores often display. Unlike other caching solutions that merely scratch the surface, LiteMage delves deep, providing a comprehensive caching mechanism that significantly cuts down on page load times. Remember, even a one-second delay in page responsiveness can lead to a 7% reduction in conversions, making speed a non-negotiable element for your online success.
One of the standout features of LiteMage is its ESI (Edge Side Includes) capability. This technology allows for hole-punching, a crucial aspect when dealing with dynamic content such as customer-specific information or shopping carts. By delivering cached pages while simultaneously updating user-specific content in real-time, LiteMage ensures a personalized shopping experience without the usual lag associated with dynamic content retrieval.
Moreover, the setup process, while comprehensive, is designed for efficiency. Whether you’re dealing with one Magento store or multiple installations across various servers, LiteMage’s flexible configuration options, including its ability to utilize RAMDISK or SSD for cache storage, ensures optimal performance regardless of your hardware setup.
In the competitive landscape of e-commerce, every second counts. Opting for LiteMage Cache for your Magento 2 store doesn’t just bring you a step ahead in the race for faster page loads; it catapults you to the forefront, ensuring your site’s speed, responsiveness, and user satisfaction remains unparalleled.
Installing LiteMage Cache on your Magento 2 store

Embarking on the journey to significantly boost your Magento 2 store’s performance begins with the installation of LiteMage Cache. This powerful tool will transform your site’s speed and user experience. Here’s how you can set it up.
First, ensure your hosting environment is optimised for LiteMage by choosing a fast disk such as a RAMDISK or SSD. This choice is crucial for achieving maximum performance from LiteMage Cache. The cache files need a designated path, which you can set at the server level in the Cache settings of LiteSpeed or for each virtual host, if hosting multiple Magento stores on the same server.
The actual installation of LiteMage Cache comprises several straightforward yet vital steps. Begin by enabling the LiteMage module for your Magento 2 site. This step involves adding a specific code to the .htaccess file under the root directory of your Magento installation. The code snippet you need is:
<IfModule LiteSpeed>
LiteMage on
</IfModule>
Upon enabling LiteMage, you’ll proceed to install and activate the LiteMage Cache extension. This extension is pivotal for integrating LiteMage’s caching capabilities with your Magento 2 store, allowing for efficient cache management and optimisation.
Testing the extension follows. It’s a critical step to ensure everything is functioning as expected. You don’t want any surprises once your site is live. Lastly, you’ll delve into tips and troubleshooting to fine-tune your setup, along with exploring advanced configuration options to tailor LiteMage Cache to your unique needs.
Remember, Edge Side Includes (ESI) will enable your site to serve private, personalised content seamlessly within publicly cached pages, ensuring your personalised pages don’t compromise on speed. Adjusting and configuring these settings can take your site’s performance from fast to lightning-fast, without compromising on the tailored experience your users expect.
By the time you’ve navigated through these steps, you’ll be well on your way to maximizing your Magento 2 store’s potential.
Configuring LiteMage Cache for optimal performance
Once you’ve installed LiteMage Cache on your Magento 2 store, the next critical step is configuring it for optimal performance. The out-of-the-box settings are a great starting point, but fine-tuning specific settings can dramatically enhance your site’s speed and user experience.
Setting Up Warm Rules
Warm Rules play a crucial role in LiteMage’s efficiency. These rules determine how LiteMage preloads your pages into the cache, ensuring they’re ready to be served instantly to your visitors. To configure Warm Rules, head to the LiteMage configuration in your Magento admin panel. Here, you can select ‘Warm Rules’ based on the popularity of URLs or combine them with URL variations for a more tailored approach. Optimizing Warm Rules ensures your site’s most visited pages are always cached and ready for lightning-fast delivery.
Configuring ESI Policies for Dynamic Content
Dynamic content represents a significant challenge for caching, but LiteMage’s Edge Side Includes (ESI) technology elegantly solves this problem. Configuring your ESI policies is key to delivering personal, dynamic content without sacrificing speed. ESI policies allow parts of your page to be cached and others to remain dynamic. This ensures that personalized content, like shopping carts and user-specific recommendations, is rendered in real-time, while the rest of the page loads from the cache. Navigate to the ESI settings in LiteMage to specify which blocks of your site should be treated as dynamic.
Testing and Adjusting Your Configuration
Testing plays a vital role in the optimization process. After configuring LiteMage, it’s important to measure the impact on your site’s page load times. Tools like Google PageSpeed Insights can provide a before-and-after analysis. Based on these insights, you may need to revisit your Warm Rules and ESI policies, fine-tuning them until you achieve the desired performance levels.
Each Magento 2 store is unique, necessitating a custom approach to the LiteMage configuration. Your aim should be to balance between caching as much content as possible and maintaining the dynamism required for a personalized user experience.
Fine-tuning LiteMage Cache settings to suit your needs

Once LiteMage Cache is up and running on your Magento 2 store, it’s essential to delve into fine-tuning the settings. This ensures the caching solution is precisely tailored to meet the unique demands of your eCommerce site. From optimizing cache warming strategies to managing ESI policies, the right adjustments can significantly enhance site performance.
Adjust ESI Policies: LiteMage’s Edge Side Includes (ESI) capability is crucial for maintaining dynamic content’s freshness without sacrificing speed. You might need to adjust the ESI policies for various blocks on your Magento site, such as shopping carts or customer-specific data, to ensure they’re updated in real-time. Tailoring these settings helps in balancing between personalization and caching efficiency.
Optimize Cache Warming: A critical feature of LiteMage is its Warm Rules configuration, allowing you to preload the cache with frequently accessed pages. By analyzing your site’s traffic patterns, you can set up rules to ensure that your most popular pages are always served from the cache, reducing load times for a majority of your visitors. This proactive approach ensures that your store delivers consistent performance even during peak traffic periods.
Configure TTL Values: Time-to-live (TTL) values are paramount in dictating how long a page or block remains in the cache before it’s refreshed. Adjusting these values so that they align with how often your content updates can prevent serving stale content while minimising the server load. For instance, static pages like ‘About Us’ can have a longer TTL, while inventory levels might need a shorter cache duration.
In identifying the perfect settings for your LiteMage Cache deployment, don’t hesitate to experiment and monitor the results. Small incremental changes followed by performance reviews allow you to gradually find the sweet spot without risking major disruptions. Remember, the goal is to craft a caching strategy that marries speed with up-to-the-minute content accuracy.
Best practices for using LiteMage Cache
When integrating LiteMage Cache into your Magento 2 store, adhering to best practices can significantly enhance your site’s performance and user experience. Here, we’ll guide you through essential tips to optimize your LiteMage setup efficiently.
Prioritise Content Caching Configuration: Start by meticulously configuring what content gets cached and what doesn’t. LiteMage allows for detailed settings, enabling you to cache dynamic content selectively. By leveraging its Edge Side Includes (ESI) feature, you can ensure personalised content, like shopping carts or customer-specific recommendations, remains dynamic and uncached. This balance between static and dynamic content is crucial for both speed and customized user experience.
Monitor and Adjust Cache Policies Regularly: Your eCommerce site is dynamic, with changing products, prices, and promotions. Frequently review and adjust your cache policies to reflect these changes. Ensure new or updated content is accurately represented by setting an appropriate Time To Live (TTL) for different types of content. A lower TTL for rapidly changing content ensures users always see the most current information.
Optimise Your Warm-Up Strategy: Efficiency in a cache warm-up strategy guarantees users always hit the cache, even on their first visit. Utilise the Page Cache Warmer crawler effectively by targeting high-traffic pages and prioritising them in your crawl list. This practice ensures popular content is always preloaded into your cache, improving hit rates and response times.
By adopting these best practices, you’ll not only boost your site’s speed but also enhance its overall scalability and reliability. Remember, a well-configured cache setup is a key component in providing a smooth and enjoyable shopping experience on your Magento 2 store.
Conclusion
Embracing LiteMage Cache for your Magento 2 site is a game-changer, ensuring your pages load faster than ever before. By following the ultimate setup guide, you’ve learned not only the how-tos but also the whys behind choosing LiteMage over other caching solutions. Remember, optimizing your hosting environment and fine-tuning the LiteMage settings are crucial steps to extract the maximum performance from your site. Regularly monitoring and adjusting your cache policies will keep your site running smoothly, providing an unmatched user experience. Don’t underestimate the power of a well-configured cache; it’s the backbone of your site’s speed, scalability, and reliability. Now, armed with the knowledge and best practices for using LiteMage Cache, you’re set to elevate your eCommerce site to new heights.